
Vendor Invoicing
The final step in the Order/Receiving/Invoicing process is to match the items on the Vendor Invoice against the items and costs that were received. This step is important to verify that you have correctly received the items you are being billed for.
Entering a Vendor Invoice:
-
Click the Vendor Invoices button on the StoreLIVE! Main Menu.
-
On the Vendor Invoice Locator screen, click the “New Vendor Invoice” button.
-
On the New Vendor Invoice screen, select the Vendor from the dropdown.
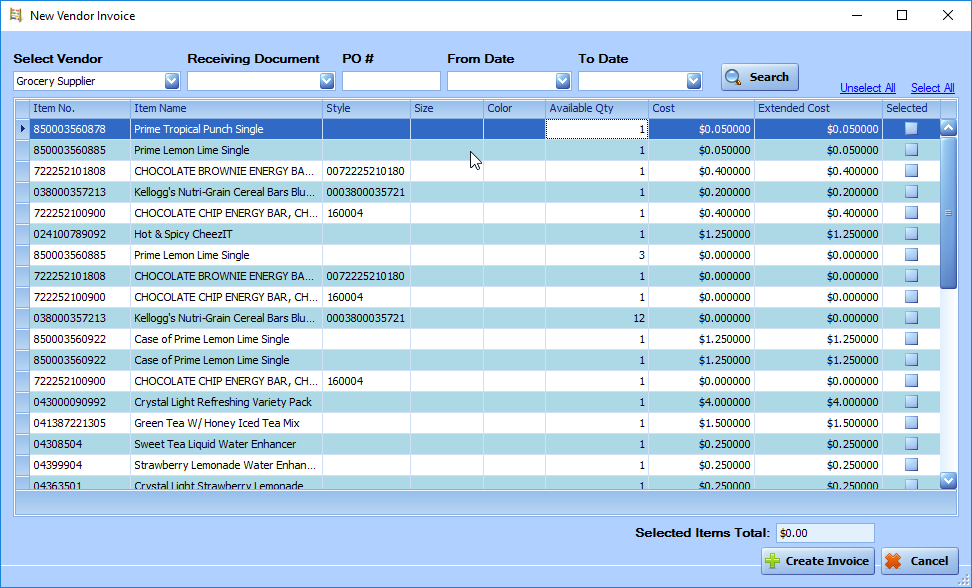
-
All items from the Vendor that have been received but not invoiced will be displayed.
-
Additional filtering can be applied to the items by selecting specific Receiving Documents, PO # or a date range.
-
Select the items that are on the vendor invoice by checking the “Selected” field next to each item. (Use the “Select All” link to select all items)
-
The Available Qty field can be decreased if needed to reflect the quantity that should be invoiced.
-
Click the “Create Invoice” button to complete the item selection and open the Vendor Invoice screen.
-
Enter the total due to the Vendor in the Vendor Invoice Total field, and the Vendor Invoice number in the Vendor Invoice No. field.
10. Enter the Invoice Date in the “Invoice Date” field.
11. Select a default warehouse from the Warehouse dropdown.
12. Select a Terms entry from the Terms dropdown, and optionally specify and Invoice Due Date.
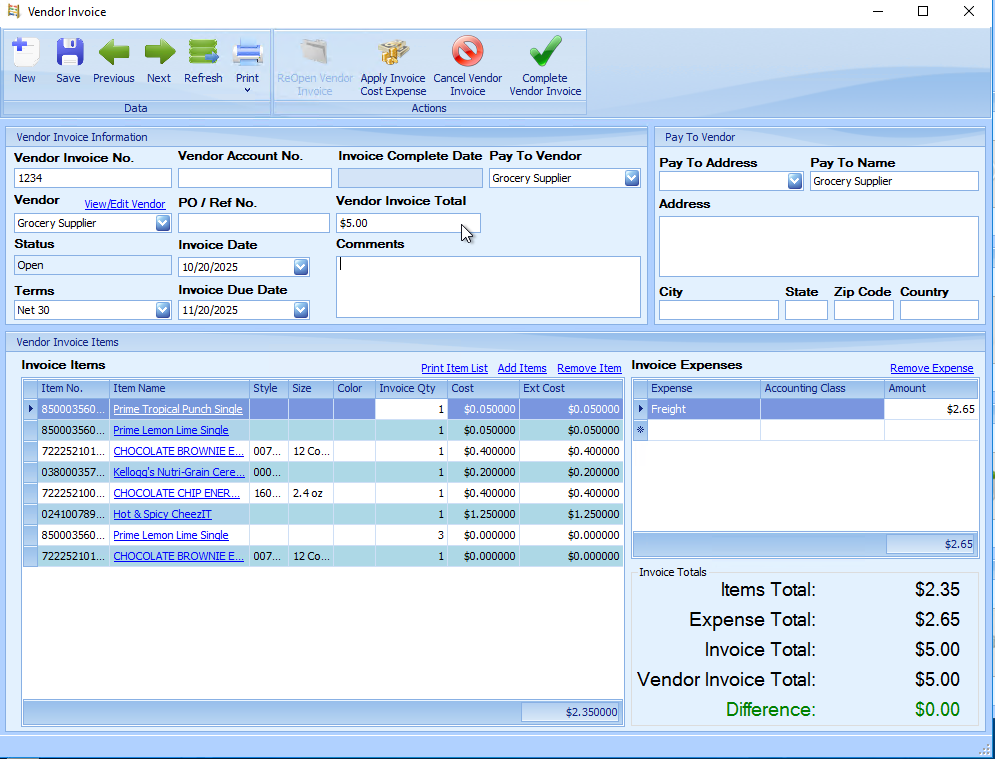
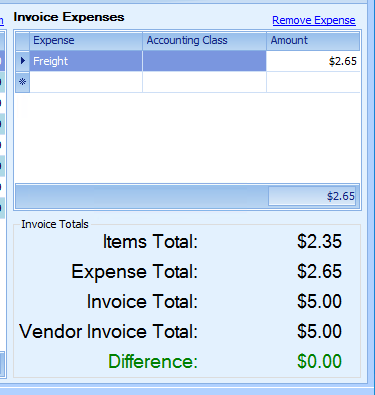
13. Check the Difference calculation at the bottom right of the screen. If a difference exists, it means that additional expenses must be entered, or the received cost of the items is different than the invoiced cost of the items.
14. If the received costs are incorrect, the item costs may be updated to reflect the actual item costs by entering new costs in the Invoice Items Cost fields. An overall difference may also be applied across all items by using the “Apply Invoice Cost Expense” feature.
a. To apply an overall difference, click the “Apply Invoice Cost Expense” toolbar icon.
b. When prompted entered the expense amount. (positive and negative numbers can be entered)
c. After clicking the “Apply Expense” button, costs will be updated. The expense is allocated to each item based on the extended cost of the item as a percentage of the overall item total.
|
Note: Changing costs on the Vendor Invoice screen does not change the actual inventory cost/value of the item. When the vendor invoice is posted to the accounting system, the difference between the inventory value of the item and invoice cost will be applied to the Cost of Goods Sold account of the item. |
15. Invoice expenses or discounts can be entered in the Invoice Expenses section. Enter expenses as positive numbers, and discounts as negative numbers. (The expense list is configured in Settings/Inventory Settings)
16. After the initial Invoice creating, additional items can be added to the invoice by clicking the “Add Items” link located above the Invoice Items list.
17. Additional fields such as Comments and a PO/Ref No. can be entered.
18. The final step is to “Complete” the invoice by clicking the “Complete Vendor Invoice” toolbar button. An Invoice can only be completed when the “Difference” amount is $0.00.
Vendor Returns
When returning items to Vendors for credit that already have been received onto inventory, the items should be “un-received”. When the actual credit is received from the Vendor, a negative Vendor invoice is entered to record the credit.
To remove the items from inventory, follow the steps in the Receiving without a Purchase Order section, but use negative quantities instead of positive quantities. When the Receiving document is completed, the items will be removed from inventory.
To record the Vendor credit, follow the steps in the Vendor Invoicing section, and select the items with the negative quantities.