
Inventory Transfers
Inventory Transfers are used to move inventory items between warehouses or locations within a warehouse.
Creating Transfers
-
Click the “Inventory Menu” button on the StoreLIVE! Main Menu.
-
When the Inventory Menu appears, click the “Inventory Transfers” button.
-
When the “Transfer Locator” screen appears, click the “New Transfer” button.
-
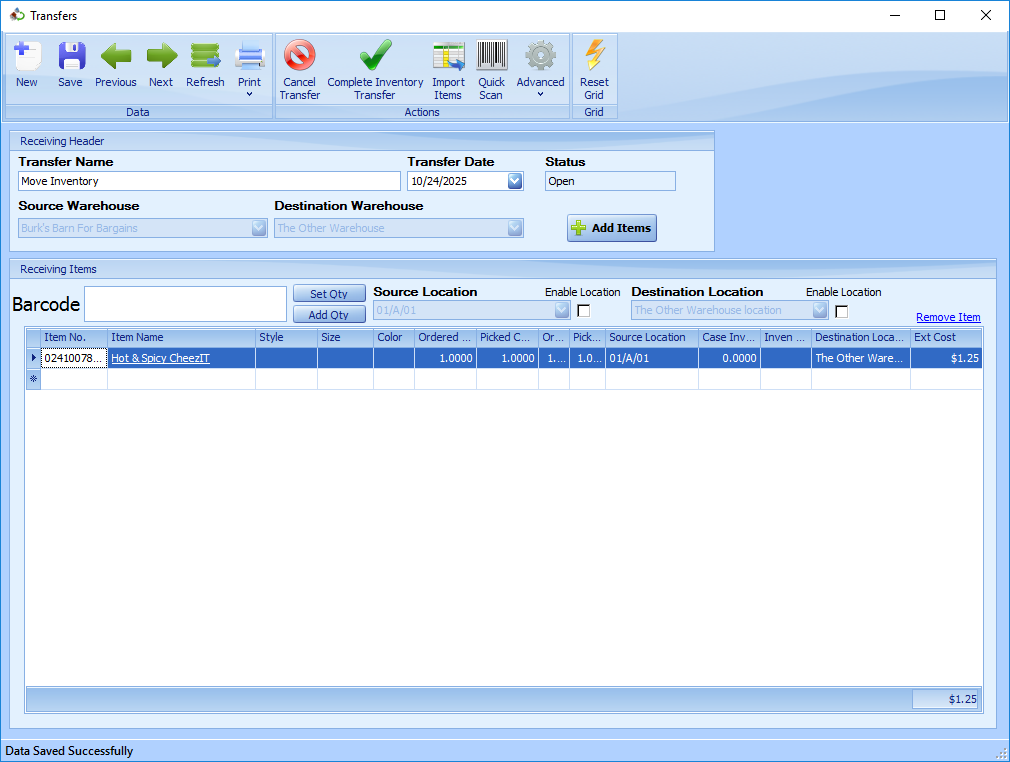
On the Transfers screen, you may identify the transfer by entering a description in the Transfer Name field.
-
The Transfer Date will be the date that the inventory activity is posted.
-
The Source warehouse should be set to the warehouse where the items are currently located.
-
The Destination Warehouse should be set to the warehouse where the items will be transferred to. Note that for location transfers within a warehouse, the source and destination warehouses should be set to the same warehouse.
-
Items may be entered onto the transfer document by entering/scanning the numbers in the Barcode field, or by entering or looking up items utilizing the Item No. field.
-
The quantity of the item to transfer should be entered into the Qty field.
10. The source location of the item should be set to the location where the item is currently located.
11. The destination location should be set to the location where the item will be transferred to.
12. Clicking the “Complete Inventory Transfer” toolbar button will process the transfer and update the inventory records.