
Your StoreLIVE! installation includes a module to track time for StoreLIVE! users (see chap. 6 for creating users). This chapter will explain the different ways to punch In/Out, allowing users to view their time and request changes, administrator reporting and error correcting, module security, and module setup.
Punching In/Out
Point-of-sale
To punch from StoreLIVE! POS, select “Time Clock” on POS Login Screen. Then enter your user number or card number. (If you have the POS set up with an RFID reader, you can scan your RFID card at this time.) Select “Punch In” or “Punch Out.” You will get a confirmation or failure message at this point.

Webpage
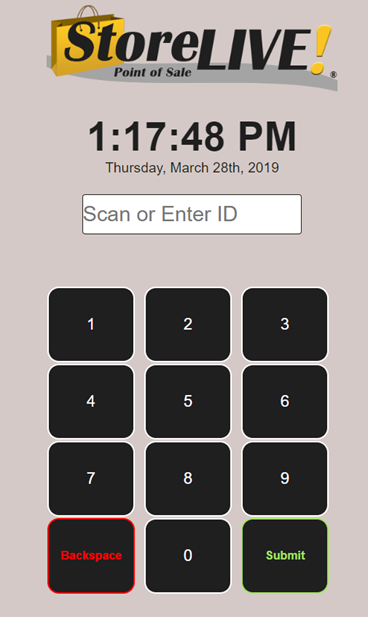
Access your time clock web page using any browser. You can enter or scan your user number or card number and select submit. You will get a confirmation message stating whether you punched In or Out. Note: the web page works well with a dedicated time clock device such as a tablet that employees can use to punch In/Out.
StoreLIVE! Manager Main Menu
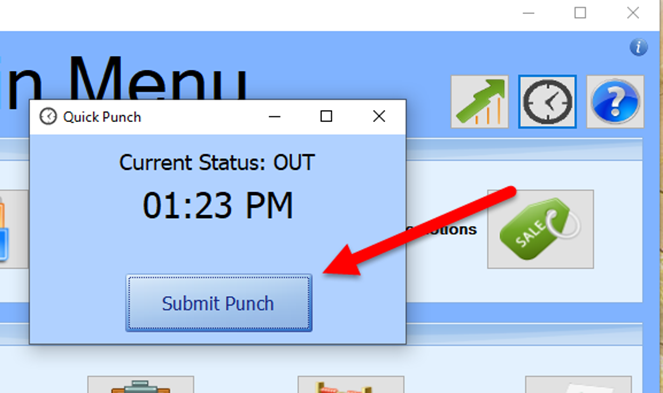
Log in to StoreLIVE! Manager with your personal user account. Select the clock icon in the upper-right corner of the Main Menu. The Quick Punch form will pop up. You can then select Submit to punch In/Out.
StoreLIVE! Manager User Time Sheet
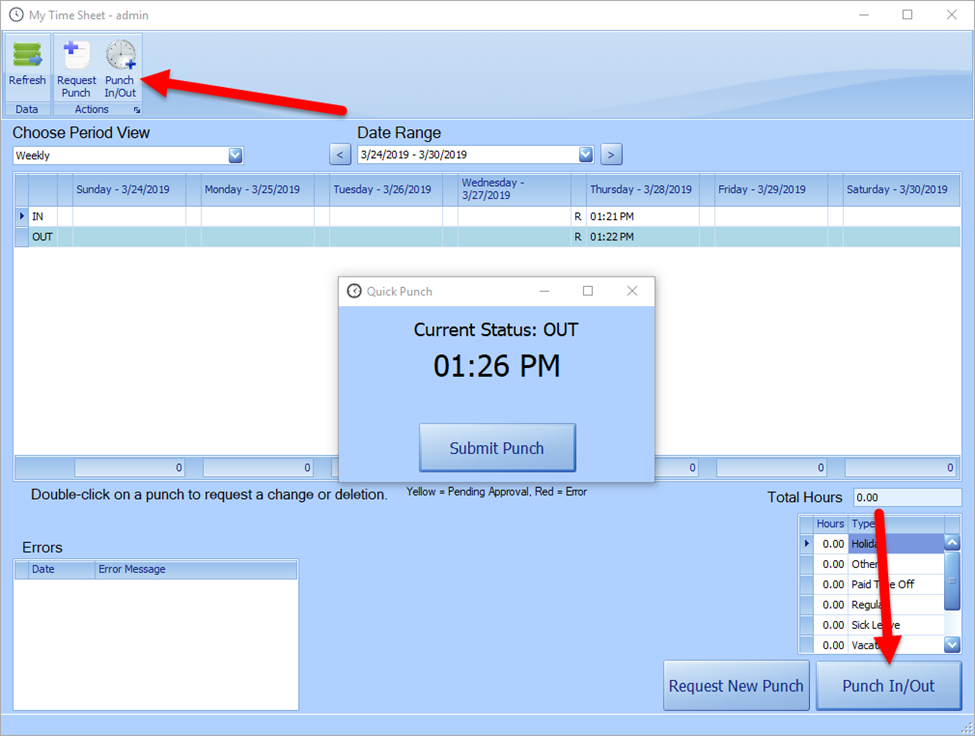
Log in to StoreLIVE! Manager with your personal user account. Select “Time Menu”, then “User Time Sheet.” You can select the “Punch In/Out” button on the ribbon, or the “Punch In/Out” button from the lower-right corner of the form. Both buttons will bring up the Quick Punch form, allowing you to submit your punch.
Managing Time
User Time Sheet
Use the User Time Sheet to view your logged time, punch In/Out (described above), and to request punch corrections/new punches. The User Time Sheet loads the current logged in StoreLIVE user.
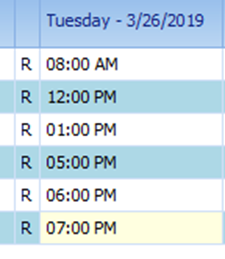
Your time logged will show on the grid. Use the “Choose Period View” and the “Date Range” view to change the grid from showing one week or two weeks and to change the currently shown date range. Total daily hours are shown on the bottom of each column. The punch type is shown to the left of each punch.
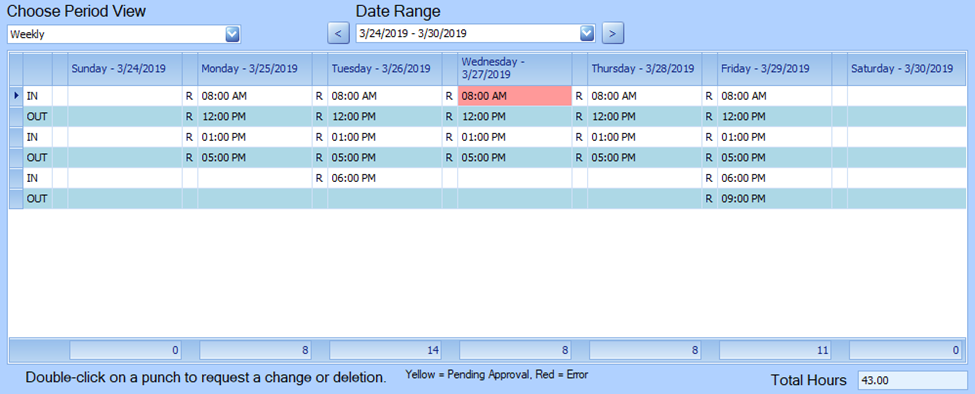
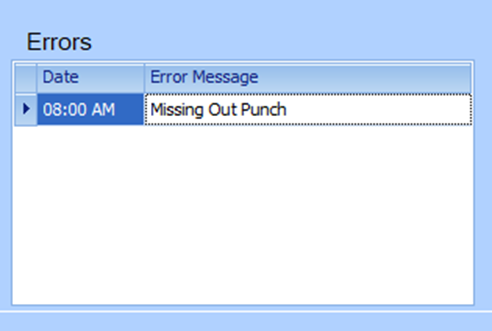
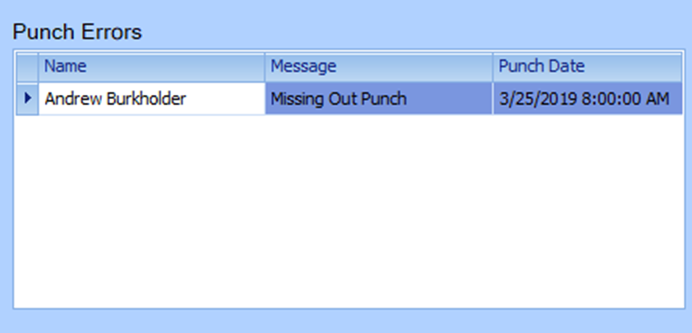
You will see your errors (such as missing punches) in the grid on the lower left corner of the screen. The corresponding punch will also appear on the hours logged grid in red.
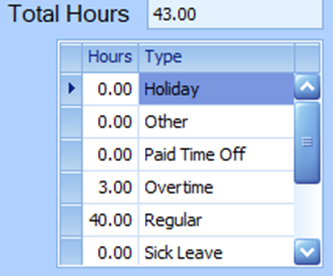
Below and to the right of the time grid you can see your total hours, as well as a breakdown of the types of hours you have accumulated in the current period.

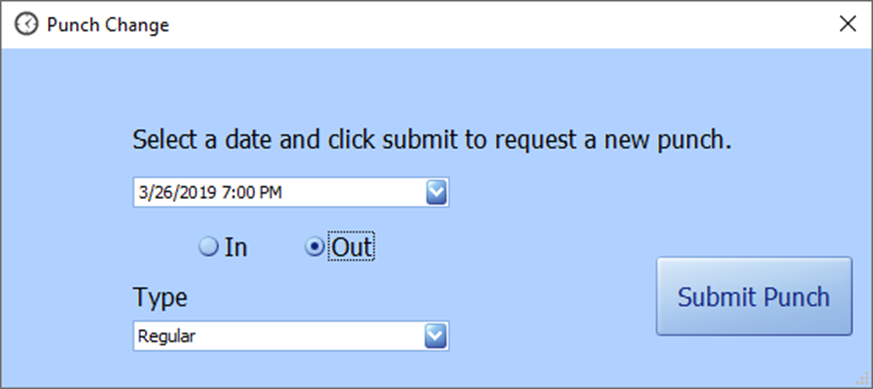
You cannot modify punches in the User Time Sheet; however, you can request punch changes. Either double-click a punch on the grid to request a modification or removal of that punch, or select Request New Punch (in the ribbon or on the bottom of the form) to request a new punch. You can then enter the details of your requested punch. It will then show up on the time grid in yellow to indicate that it is pending approval by a manager.
User Time Sheet Ribbon
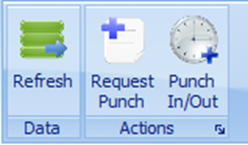
Refresh: reload all punches on the grid.
Request Punch: bring up the form to request a new punch.
Punch In/Out: bring up the Quick Punch form.
Admin Time Sheet
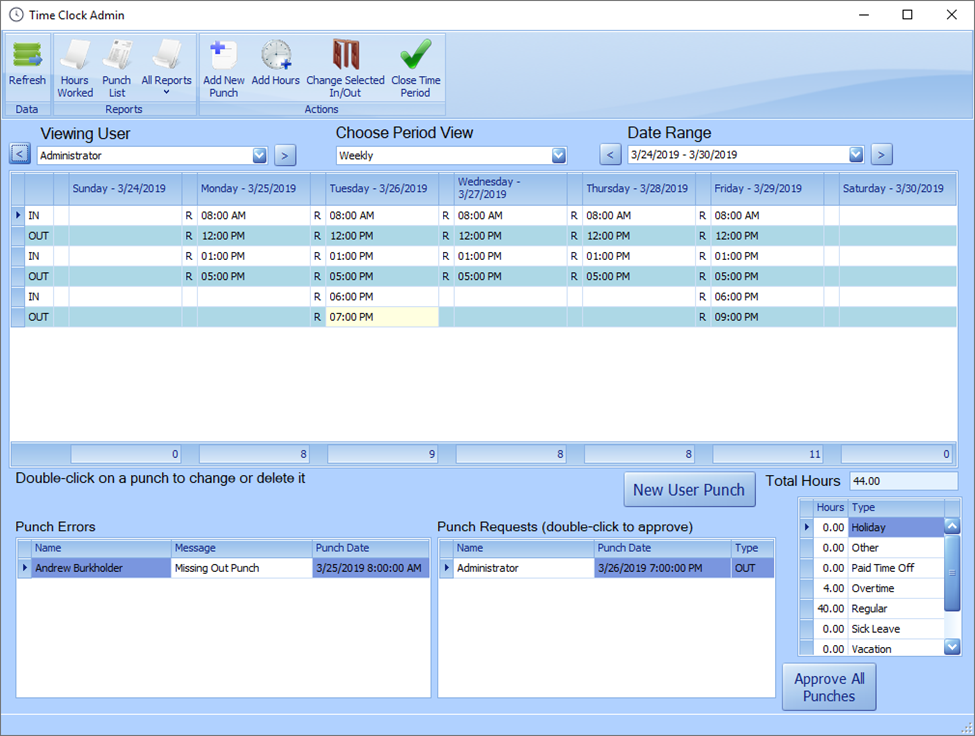
Access the Admin Time Sheet by selecting “Time Menu” on StoreLIVE Main Menu and selecting “Admin Time Sheet.” The admin time sheet can view and edit all user punches. Select the user you wish to display in the “Viewing User” dropdown. You can move back and forth through the user list by selecting the right and left arrow buttons on either side of the dropdown.

The currently selected user’s time logged will show on the grid. Use the “Choose Period View” and the “Date Range” view to change the grid from showing one week or two weeks and to change the current shown date range. Total daily hours are shown on the bottom of each column. The punch type is shown to the left of each punch.
Below and to the right of the time grid you can see the currently displayed user’s total hours, as well as a breakdown of the types of hours he or she has accumulated in the current period.
You can double-click the time logged grid to edit or remove a punch. If you double-click a blank space underneath a current punch, you can add a new punch with some features filled in by default. This is useful when adding missed punches. Alternately, you can select New User Punch to create a new punch for the currently displayed user.
You will see errors for all users in the current period displayed on the grid to the lower-left of the form. Double-click an error to change the currently displayed user and see his or her punches.
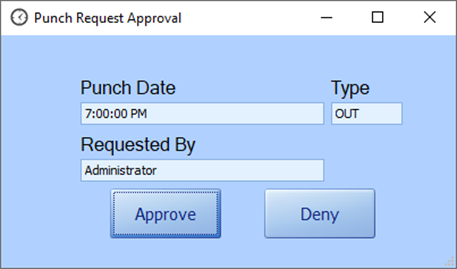
The punch requests grid displays requested punches for all users in the current period. Double-click a punch. You will then be given the option to approve or deny the punch.
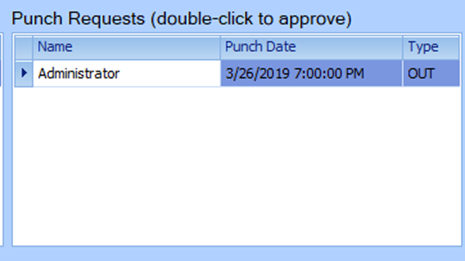
You can also select Approve All Punches to quickly approve all punches (you will be prompted to confirm).
Admin Time Sheet Ribbon

Refresh: Reload punches to refresh the displayed grid.
Hours Worked: View the Hours Worked report.
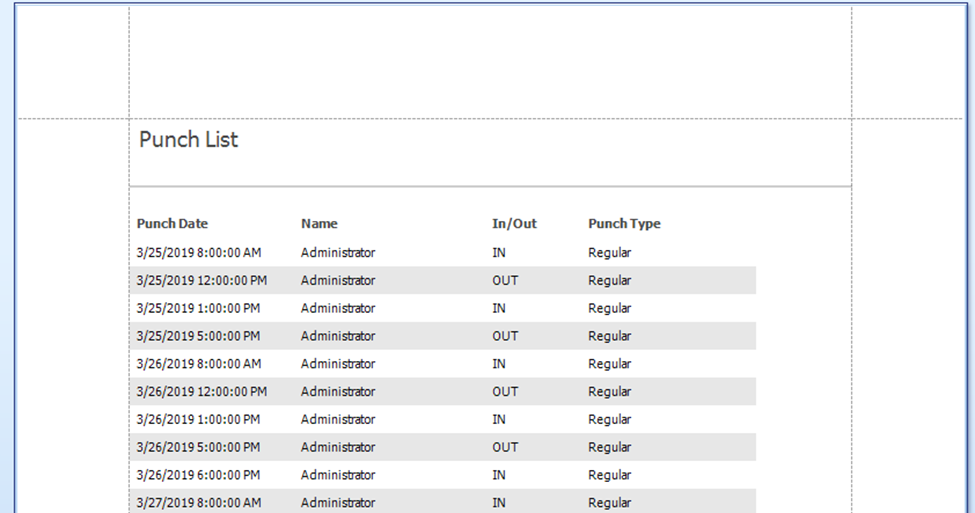
Punch List: View the Punch List report.
All Reports: Display a dropdown of all Reports
Add New Punch: Add a new punch for the currently displayed user.
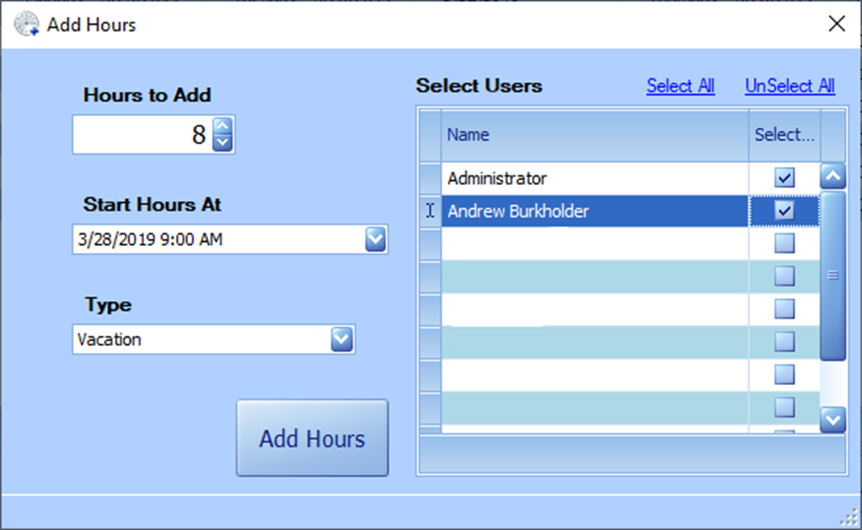
Add Hours: Add hours for user(s), such as vacation time. Select the number of hours to add, the date and time to start the hours, and the Type. You can also select multiple users for which to add the hours.
Change Selected In/Out: Click and drag over several punches on the time grid and then select this button to change the selected punches, switching an In to an Out and vice versa. Click yes when prompted.
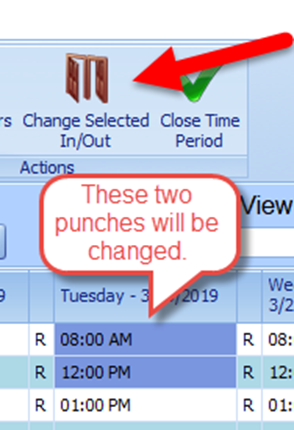
Close Time Period: This will close the current pay period (not just the currently displayed dates) and prevent further changes to the pay period.
Time Reports
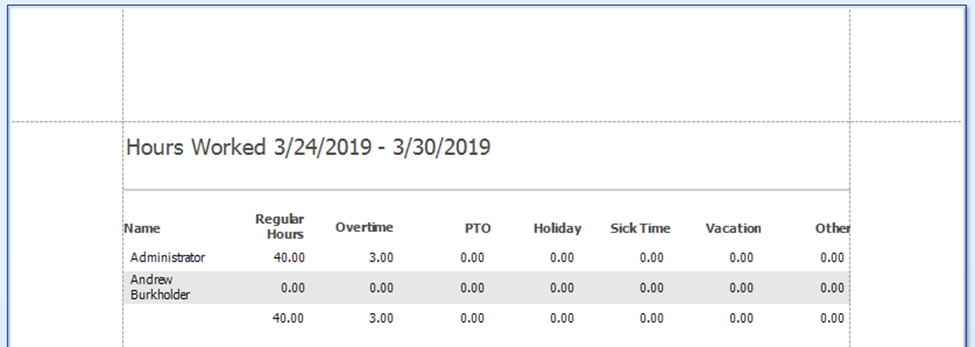
Hours Worked: This report shows hours by type and user for the currently displayed time period.
Hours Worked with User Fields: This report shows hours by type and user. It additionally gives you the option of selecting the date range and users, rather than showing all users and just the current time range.
Punch List: This report shows punches in the current time period.
These reports can be access from the Reports Screen on the Main Menu with some additional filters.
Security
All active StoreLIVE users can punch In/Out.
Users can be given access to User Time Sheet, which will allow them to see their punches and request changes/new punches. They will not be able to modify their punches.
All users given access to the Admin Time Sheet are able to view and edit all users’ punches, including their own. They are able to approve punch requests and edit users’ punches.
To grant a user access to the User Time Sheet or Admin Time Sheet, go to User Maintenance (Main Menu> Users [enter Advanced Password]>Select a user to modify).
Scroll down the User Security section till you see Time Clock User and Time Clock Admin. Check the appropriate boxes.
