
If compatible, a vendor’s catalog can be imported into StoreLIVE! Once imported into StoreLIVE! this catalog can be used to view and search through the items included in the vendor catalog. Additionally items from the catalog can be transferred over to create new items or update existing items already in the database.
Opening a Vendor Catalog
-
Click on the Vendors/Manufacturers button in the StoreLIVE! Main Menu.
-
Search for the vendor whose catalog is to be viewed and double click that vendor’s name.
-
Once in the Vendors/Mfg.. window, click the Vendor Catalog button.
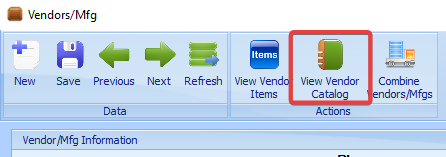
Once the View Vendor Catalog button is clicked, a Vendor Catalog window will open.
Updating the Catalog
Upon the window loading, a ‘Check for updates’ popup may appear if a catalog is already present, if Yes is clicked the program will use the login saved under the Vendor information to try and log in and download the newest catalog. If No is clicked the window will simply close.
Searching the Catalog
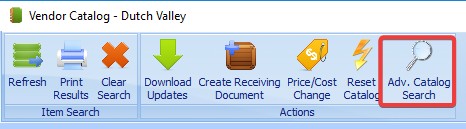
There are a few different ways the items in the catalog can be searched through or sorted depending on the information that needs to be collected. The first method is to use the Advanced Catalog Search button shown below.
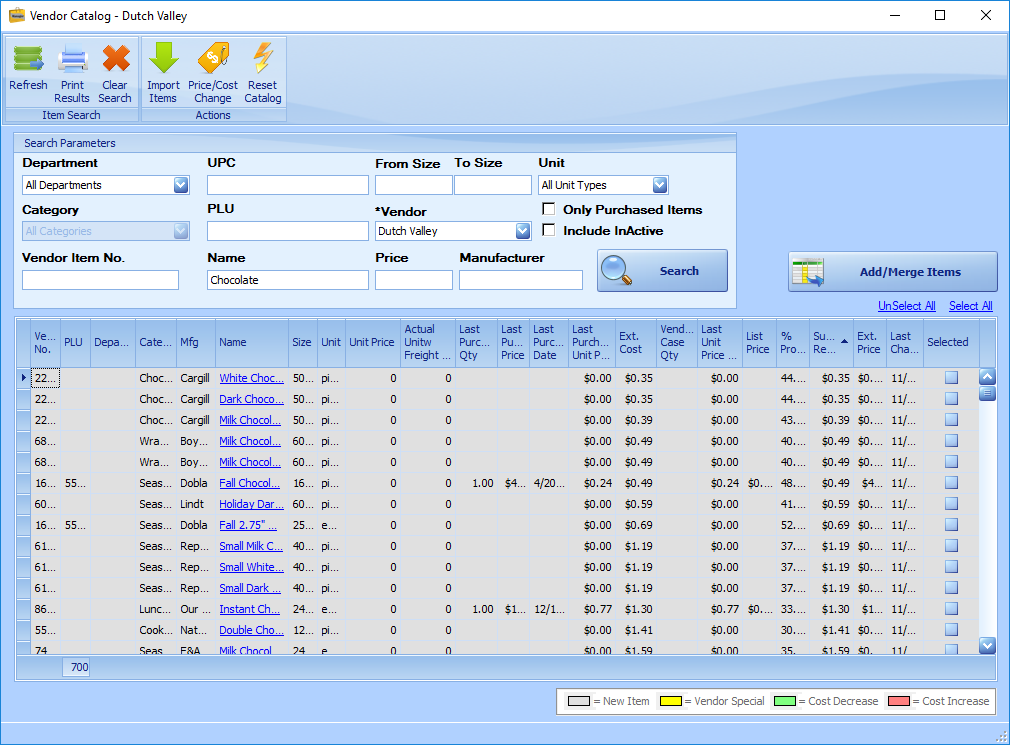
This page is the standard search tab; fill in whatever criteria is needed to narrow down the list of items. This tab is primarily filled with a lot of the expected fields such as Department, Category and Vendor Item No. One option to take special note of is the “Only Purchased Items” checkbox. If this box is checked the search results will only include items that have previously been purchased before.
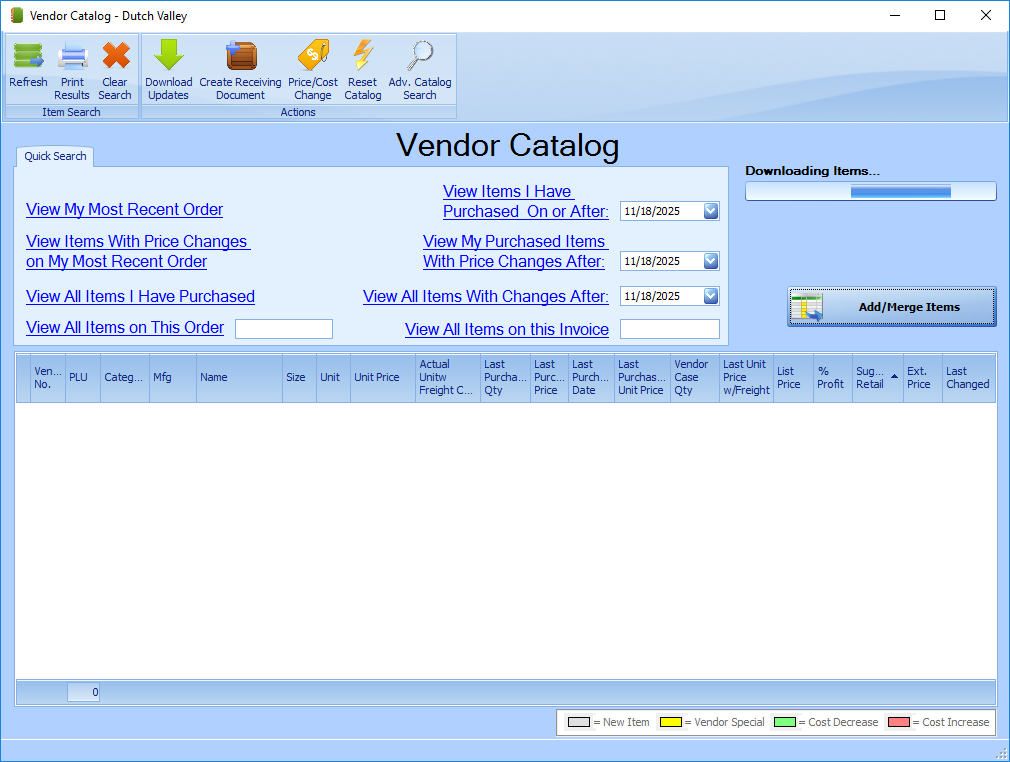
The other main way to search is the “Quick Search” tab. This tab we will be going into in a bit more detail.
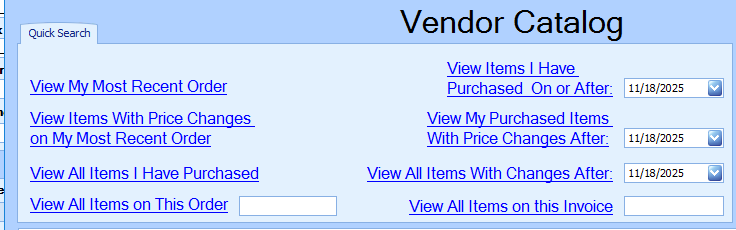
There are many different links listed under the Quick Search tab as shown above. Each link is a ‘Quick Search’ with predefined search parameters. The types of quick searches are listed below:
View Most Recent Order – Displays the items in the catalog that were purchased from the selected vendor on the most recent purchase order.
View Items With Price Changes on My Most Recent Order – Displays the items on the most recent purchase order, but only displays those that also have a price change.
View All Items I Have Purchased – Displays every item in the catalog that has been previously purchased
View All Items- Displays every item listed in the catalog.
View My Purchased Items With Changes After XX/XX/XXXX– Displays any items that have been purchased and have had changes made to them after the specified date.
View My Purchased Items With Price Changes After XX/XX/XXXX- Displays any items that have been purchased and have had price changes after the specified date.
View All Items With Changes After XX/XX/XXXX- Displays all items that have had changes after the specified date regardless of whether or not they were ever purchased.
View All Items on This Order XXXXXX- Displays all items that were included on a specific Order Number
View All Items on This Invoice XXXXXX- Displays all items that were included on a specific Invoice Number
These options will vary depending on the data made available by the vendor.
Receiving Items from Vendor Catalog – Most Recent Order
Items can also be received using the vendor catalog. To receive items this way, first open a vendor’s catalog. Items can be located normally to create a receiving document, but we will be exploring a more common use for this tool.
-
Click the ‘View My Most Recent Order’ under the Quick Search tab. This should bring up a list of the items on the most recent order for this vendor. Alternatively an invoice number or order number can be specified.
-
Select the items that should be received, or, more commonly, click the Select All link to select every item in the most recent order.
-
Select the “Create Receiving Document” Button

-
From this point on, the options are the same as setting up a receiving document any other way. Select a PO to use (if there is one), and designate which warehouse and location the items should be received on. Then click Start Receiving. If further instruction is desired on receiving items, check out the chapter on Receiving.
Update/Adding New Items from the Catalog
To add items from the catalog, first a search must be used to find the item that is to be added. Typically this is done with the most recent order. The key at the bottom will tell you what the different colors mean. Items are identified as new items if an item with the vendor and vendor number does not exist.
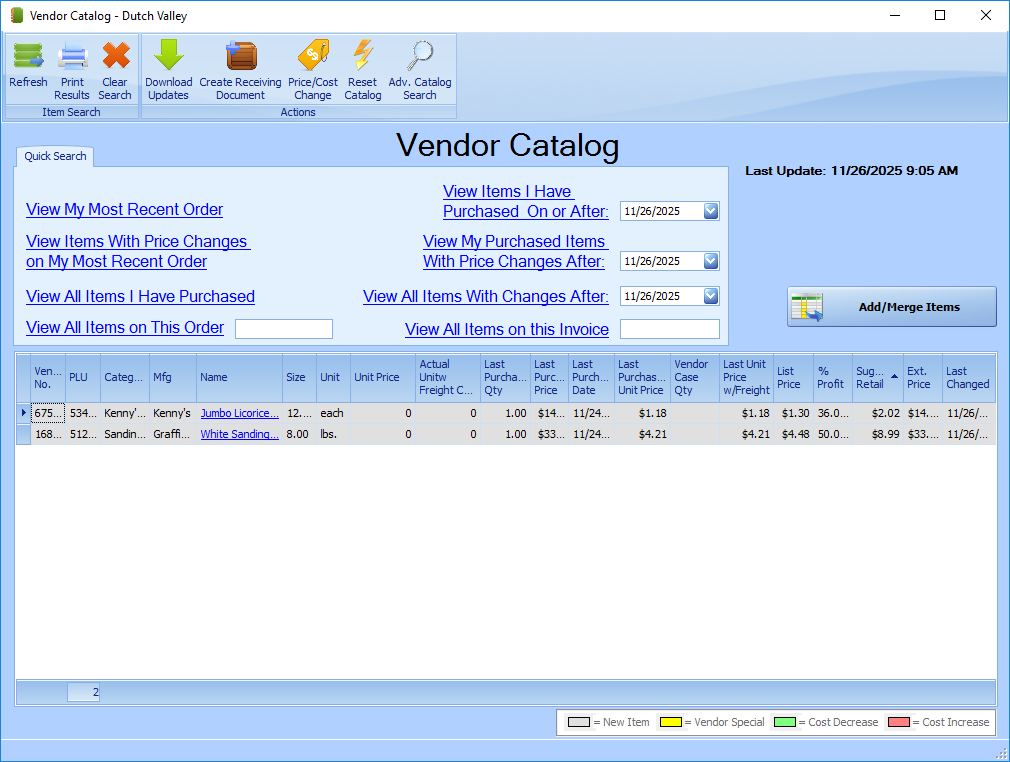
Once the items to be updated/added have been found click the Add/Merge Items button. This will update the item information on existing items and 2nd window will appear to add the new items.
Set the default Department, Category, Sub-Category, Item Type, and Default Mfg.. (if applicable). Also, check the ‘Create Case Items’ checkbox if the items are to be used in making/selling a case item.
Select the items you would like to add to selected department & category. Finally click the Add Items button, Add Items and Close, or Ignore if no items should be created.
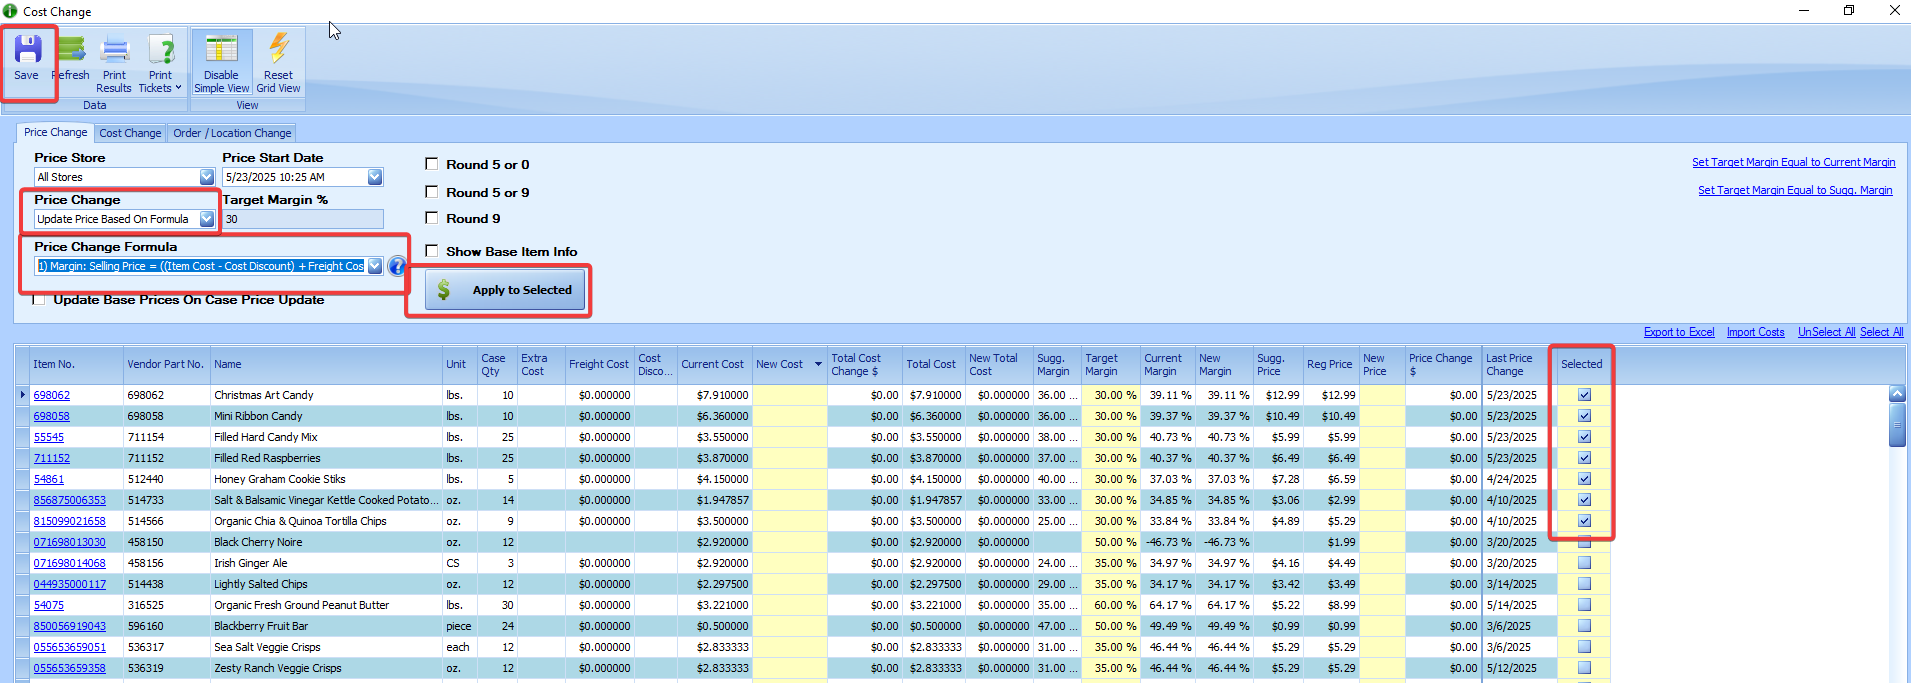
Processing Cost Changes
The next screen to appear is the Price/Cost Change Screen.
Price Store – Used to specify which Stores are affected by the price change
Price Start Date – Date and time the price change will take effect.
Price Change – This dropdown field is used to select the type of price change that will take effect in relation to the Price field. The Price field will label will change based on the Price Change selection. Enter percentages as a decimal (30% = .30) The first 3 options are the same options given in the Cost Change dropdown and functions the same. There are 5 additional options present:
-
Set Price equal to % Margin – Uses the number input in the price field as the % margin desired, and calculates the price to meet that new margin.
-
Set Price equal to % Markup – Uses the number input in the price field as the % Markup desired, and calculates the price to meet that new markup.
-
Update Price Based on Formula – This updates the price based on the formula selected in the Price Change Formula box. This is primarily used to update prices after cost changes are implemented.
-
Margin: Selling Price = ((Item Cost - Cost Discount) + Freight Cost + Extra Cost) / (1- Margin %)
This formula uses the sum of the item cost, freight cost, and extra cost in conjunction with the target margin to calculate the new price. This formula adds margin to the freight cost and extra cost. -
Margin: Selling Price = (((Item Cost - Cost Discount) + Freight Cost) / (1- Margin %)) + Extra Cost
This formula uses the sum of the item cost and freight cost in conjunction with the target margin to calculate the new price. This formula adds margin to the freight cost and adds the extra cost to the selling price. -
Margin: Selling Price = ((Item Cost - Cost Discount) / (1- Margin %)) + Freight Cost + Extra Cost
This formula uses the item cost in conjunction with the target margin to calculate the new price. This formula adds margin only to the item cost and adds the freight cost and extra cost to the selling price.
-
The following formulas are treat costs like the previous formulas but use a markup calculation to arrive at the new selling price instead of the margin calculation.
Markup: Selling Price = ((Item Cost - Cost Discount) + Freight Cost + Extra Cost) * (Markup %)
Markup: Selling Price = (((Item Cost - Cost Discount) + Freight Cost) * Markup %) + Extra Cost
Markup: Selling Price = ((Item Cost - Cost Discount) * (Markup %)) + Freight Cost + Extra Cost
-
Set Target Margin Equal to – Use this option to set the target margin of an item(s). Enter the percentage as a decimal (30% = .30) Please note that there are two addition blue links on this screen that can be used to update target margins: The are Set Target Margin to Current Margin and Set Target Margin Equal to Sugg. Margin.
-
Increase Target Margin By %– This will increase the target margin by the percentage entered. For example if the target margin is 30% and 20% is entered, the new target margin will be 50%. Enter the percentage as a decimal (30% = .30)
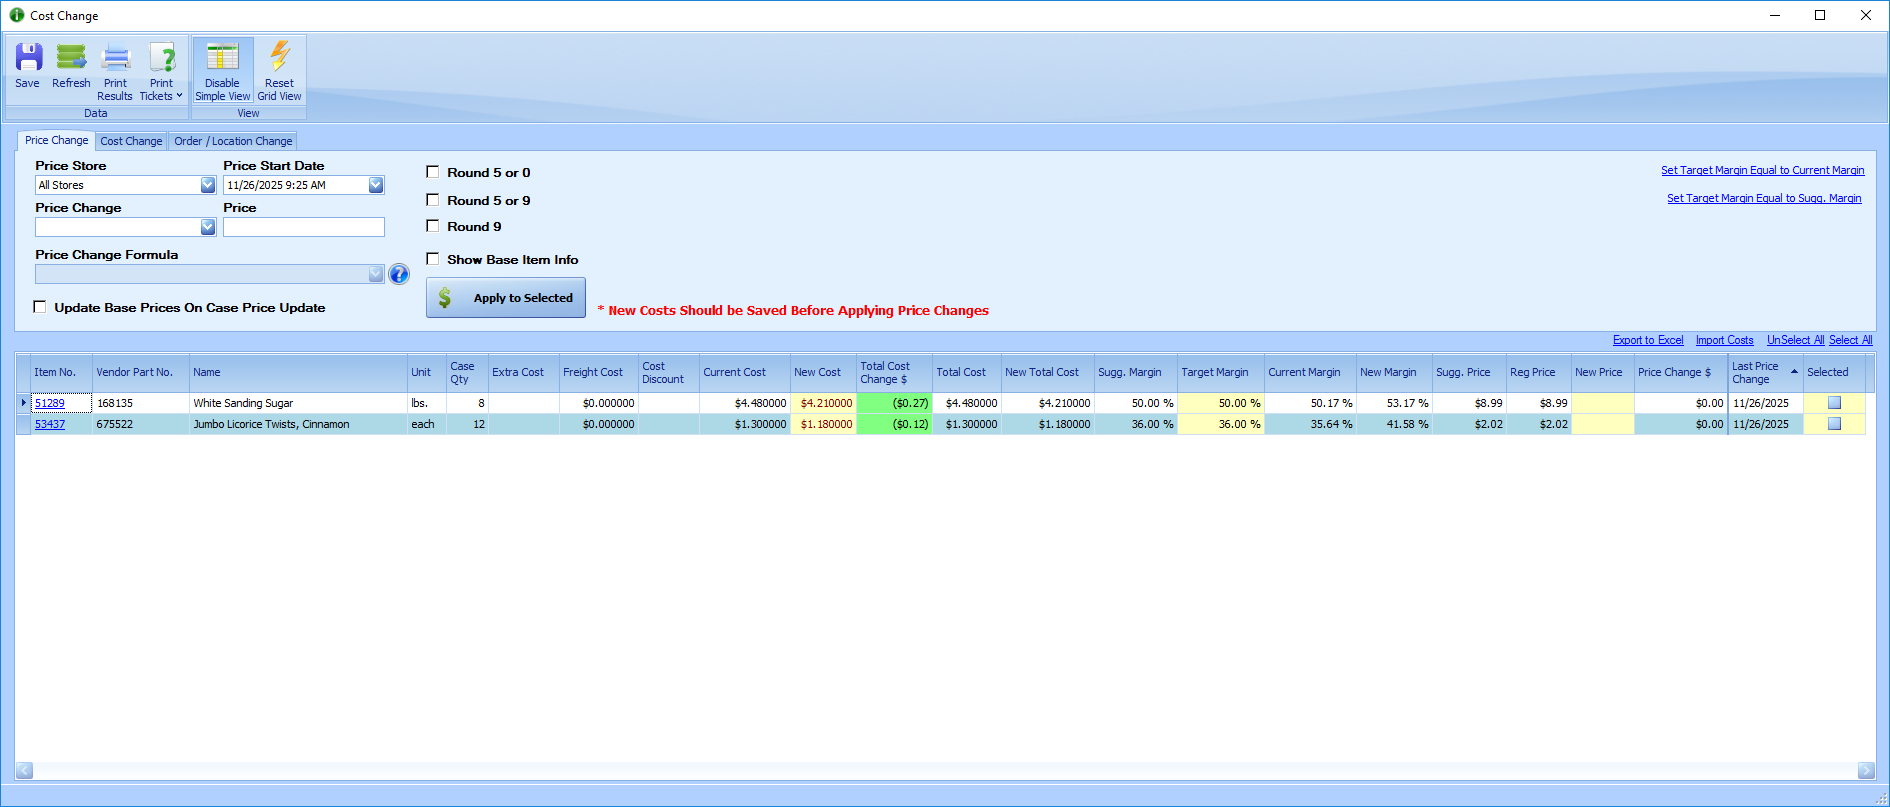
If case items are included on the list Show Base Item Info can be checked to see item information of the base item. Also Update Base Prices on Case Price Update will update the base item price when the case item is update.
Tips:
Click Enable Simple View to hide less relevant columns.
Run the New Items Report (under StoreLIVE! Reports) to see recently added items.
To review and print shelf labels for items with price changes,
Sort by Last Price Change and Select the items with recent changes
Click Print Labels
For