
Vendors and Manufacturers (sometimes referred to as Brands) are tracked in a common list in StoreLIVE! This allows a single record for a company that functions both as a vendor and a manufacturer.
Maintaining Vendors and Manufacturers
-
Vendor and manufacturer information is accessed by clicking the “Vendors/Manufacturers” button on the StoreLIVE! Main Menu.
-
At the “Search Vendors/Mfg” screen, existing vendors can be located by entering search criteria and clicking the “Search” button.
-
Once search results are displayed, the vendor/manufacturer can be loaded by double-clicking the entry.
-
To create a new vendor or manufacturer instead, click the “F1 - New Vendor/Mfg” button.
-
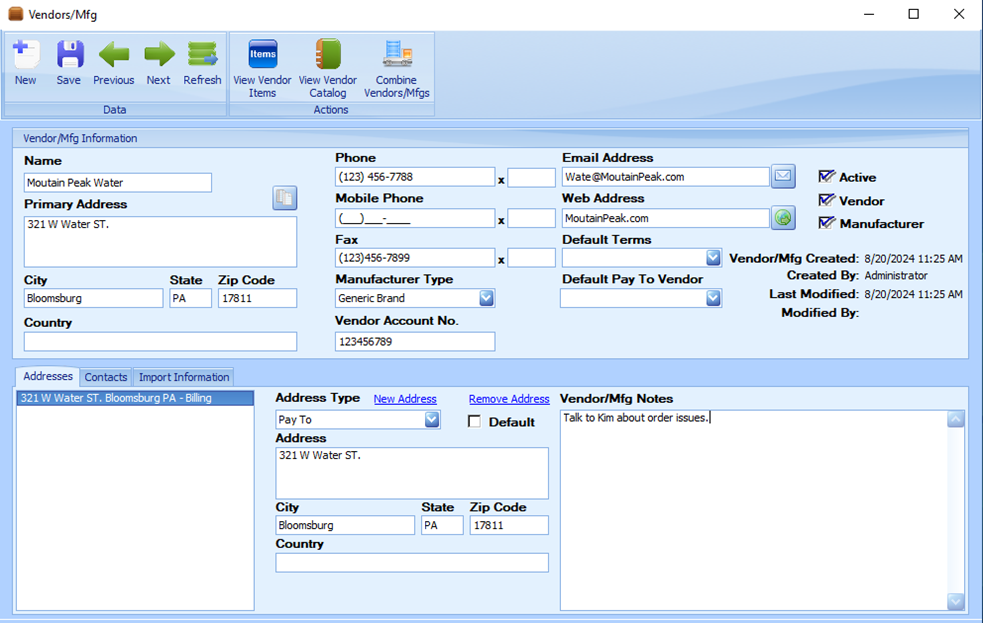
After choosing an existing vendor/manufacturer or clicking the “F1 - New Vendor/Mfg” button, the “Vendors/Mfg” window is displayed. The only completely necessary information to fill in here is the Name and the correct checkboxes (Active, Vendor, and Manufacturer).
-
The vendor/manufacturer name should be entered in the Name field.
-
The vendor’s primary address should be entered in the Primary Address fields.
-
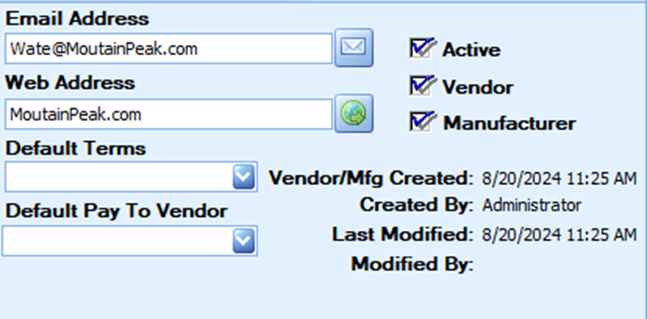
Other vendor information can be entered in the Phone and Email/Web Address fields.
-
A manufacturer type can be selected from the Manufacturer Type dropdown. This field can be used on item search screens to filter items based on the Manufacturer Type.
-
If the company being entered is a vendor, the vendor’s default terms should be selected from the Default Terms dropdown. Default terms can be set up in “Main Menu/Settings/ Accounting Settings/Terms Setup.” When a PO is created for this vendor, this will be the default terms entered on the PO.
-
A vendor account number can be entered in the Vendor Account No. field. When a PO is created for this vendor, this will be the default account number entered on the PO.
-
The ‘Active’ checkbox indicates if the vendor/manufacturer is active in the system
-
The ‘Vendor’ and ‘Manufacturer’ checkboxes are used to indicate the type of record being created. In order for the record to appear in Vendor dropdowns throughout the system, the ‘Vendor’ checkbox must be checked; and in order for the record to appear in Manufacturer dropdowns, the ‘Manufacturer’ checkbox must be checked.
Note: If a vendor or manufacturer is not appearing in a dropdown, verify that the ‘Vendor’ and ‘Manufacturer’ checkboxes are selected correctly!
-
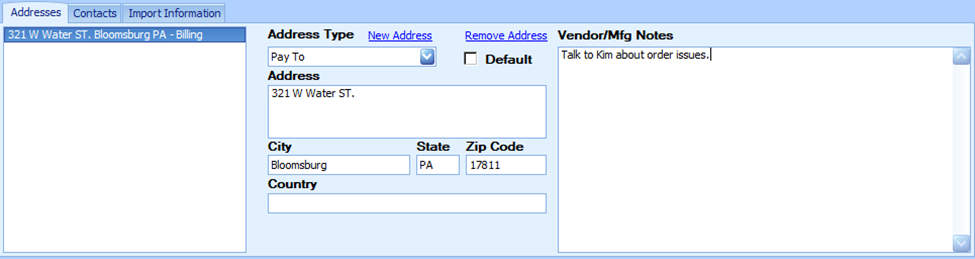
Notes about the vendor/manufacturer may be stored in the Vendor/Mfg Notes field.
-
For companies with multiple addresses, additional addresses may be maintained in the “Addresses” section. (see below)
-
To create a new address, click the New Address link and enter the address information in the corresponding fields.
-
An “Address Type” should be assigned to the address. For documents such as Purchase Orders, the vendor’s Primary Address will be utilized as the “Pay To” address, unless a secondary address exists with this specific Address Type.
-
Multiple addresses may be specified. To set up an address as the default “Pay To” address, click the ‘Default’ checkbox on the corresponding address.
-
To remove an address that is no longer needed, simply click the Remove Address link, and the highlighted address will be removed.
-
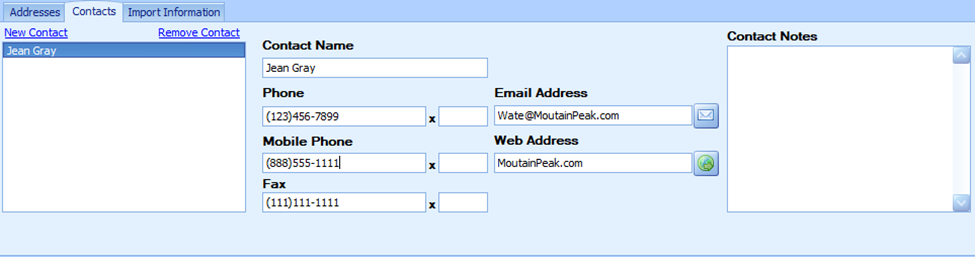
Contact information for specific people or groups within the company can be stored within the “Contacts” tab. (see below)
-
To create a new contact, click the New Contact link and enter the contact information in the corresponding fields.
-
Notes about the contact can be stored in the “Contact Notes” field.
-
The “Import Information” tab is used to store login information for a vendor. This information is ONLY used to automatically download/import a vendor’s updated products catalog if it is supported by that vendor.
-
To set up an automatic import, in the corresponding fields enter the Import Username and Import Password used for the vendor that is to be imported. Then, click the dropdown box under Import Code and select the corresponding import type in the listing. (see below)

Note: A manual import of catalog information can still be entered from a file such as an Excel document, which will be covered in a later section. This import information is ONLY used for an automatic import.
-
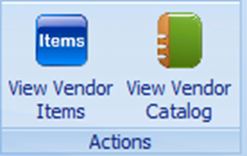
If the Vendor has a catalog, it can be viewed by clicking the “View Vendor Catalog” button along the top of the window. (see below)
The following screen or similar will appear. (see below)
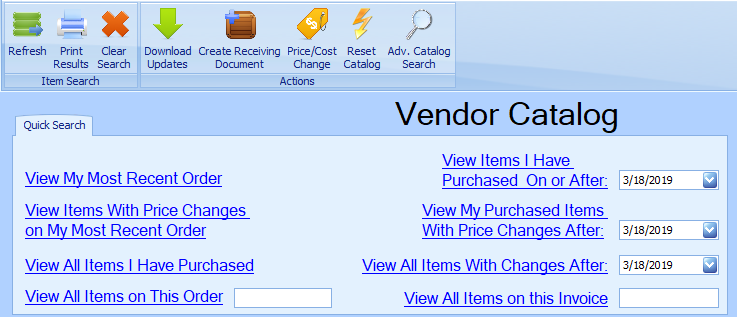
From here you can view items from that vendor based on your search criteria of choice.
-
Likewise, if you wish to view the items that are carried from that vendor, click the “View Vendor Items” button. The Item Maintenance “Item Locator” window will appear with a list of all that vendor’s items that are in StoreLIVE!
The Item Maintenance screen is covered in detail in Chapter 2.