
The StoreLIVE! “Users” program allows users to be created or edited, and specific permissions to be granted for those users.
Creating/Editing Users
-
Click the Users button on the StoreLIVE! Main Menu.
-
You will be prompted for an Advanced Password. You must enter this password in order to gain access to the Users screen.
-
After entering a valid password, the User Locator will appear.
-
Enter search criteria and click “Search” to display existing users. Double-click on the user entry in the search results to load that user’s information, or click the “F1 - New User” button to create a new user.
-
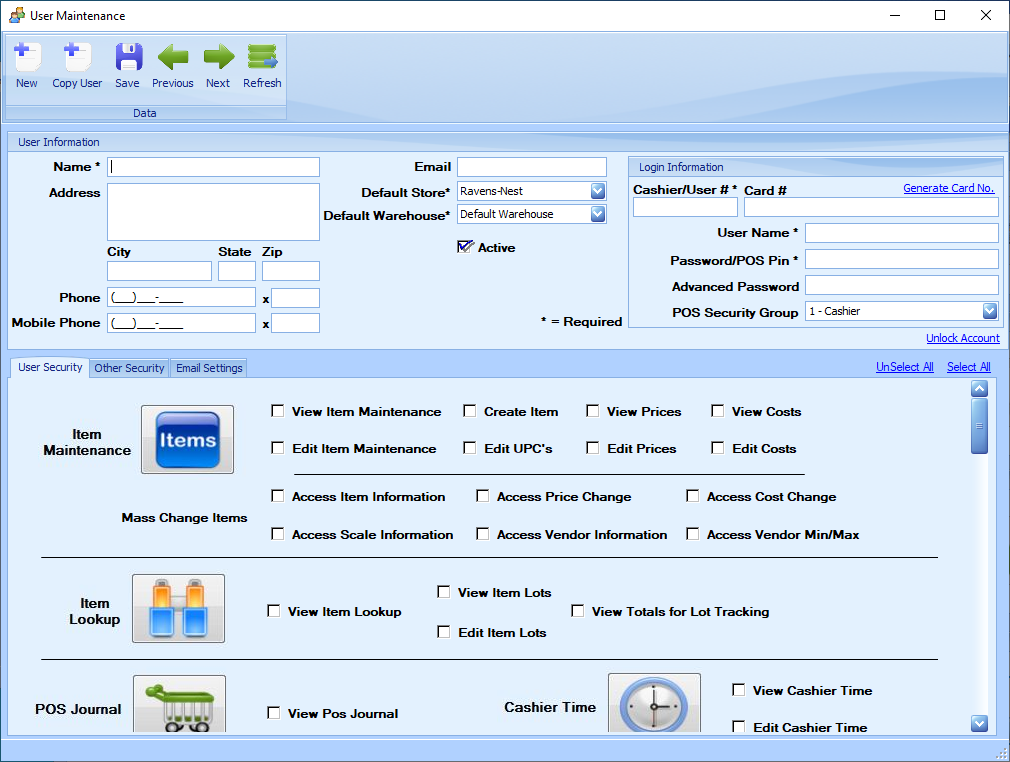
The User Maintenance screen consists of general User Information, Login Information, User Security, and Reports Security.
Fields with an asterisk (*) are required
-
User Information includes the following fields:
a. Name – The user’s name
b. Address/City/State/Zip – The user’s mailing address
c. Phone/Mobile Phone – User’s phone numbers
d. Email – User’s email address. This field is required for the forgot password feature to function.
e. Default Store – The default store assigned to the user. In a multi-store setup, this should be the store where the user primarily works. This is used as a default on screens where a store is required.
f. Default Warehouse – The default warehouse assigned to the user. This should be the warehouse either associated with the user’s primary store, or the warehouse in which the user primarily works.
g. Active – When checked, the user record is active and the user may log in to StoreLIVE! When not checked, the record is inactive, and the user no longer has access to the StoreLIVE! system.
-
Login Information includes the following fields:
a. Cashier/User # – A unique user or employee number assigned to the user. This number can be used to log in to the Point of Sale and StoreLIVE! Manager system in place of a username.
b. User Name – A unique user name assigned to the user. This username can be used to log in to the StoreLIVE! Manager program. This may be the same as the User #.
c. Password/POS Pin – The password associated with the user. This password is the password required to log in to the Point of Sale and StoreLIVE! Manager programs. For users that need access to the Point of Sale system, a numeric-only password is recommended, as most Point-of-Sale registers only have numeric entry capabilities.
d. Advanced Password – The password required to gain access to the “Settings” and “Users” in StoreLIVE! Manager. Only employees who need to have access to these screens should be assigned an Advanced Password. This field can be left blank for all other users. Advanced Passwords must be at least seven (7) characters in length, include uppercase and lowercase letters, and include at least one number. Advanced Passwords expire after 90 days, and must be changed at that time. The new password entered must be different than the four previously used passwords!
e. POS Security Group – If a user should have access to login at the Point of Sale system, a POS Security Group must be selected. For users that should not have access to the Point of Sale system, the “0 - No Access” selection should be used. The POS Security groups give the following default permissions (These privileges can be customized if needed. Contact StoreLIVE! support for assistance if this is required):
i. 1 - Cashier – Ability to ring up sales and accept payments. The cashier does not have permission to return items.
ii. 2 - Service Desk – Cashier privileges, plus the ability to return items when the original receipt is present. The service desk also has limited permission to return items without receipts, as well as access to more of the MGR Menu buttons on POS.
iii. 3 - Manager – The Manager has full control of all Point of Sale functions and overrides, as well as full access to the MGR Menu.
-
User Security - User Security includes detailed security settings for each application in the StoreLIVE! System. Each option that should be available to the user should be checked.
(There are “Select All” and “UnSelect All” links to check all boxes in that field at once.)
-
Other Security - This is a tab of security-related options that has several subsections.
a. Reports – This section displays a list of all reports available in StoreLIVE! Check the “View Report” checkbox next to each report that the user should have access to. Users may be given the ability to add reports to the system if the “Create Reports” box is checked.
b. Stores – This section displays a list of all stores currently listed in StoreLIVE! Check the “View Store” checkbox next to each store that the user should have access to. Users may be given the ability to add stores to the system if the “Create Stores” box is checked.
c. Departments – This section displays a list of all departments currently created in the StoreLIVE! system. Check the “View Department” box next to each department that the user should have access to. Users may also be given the ability to add departments to the system if the “Create Departments” box is checked.
Note: If a user is given “Create” privileges for a specified category, they also automatically gain access to every item within that group throughout StoreLIVE! For instance, if a user is given the privilege to create departments, then that user will be able to view all departments by default throughout the rest of StoreLIVE!
Locked User Accounts
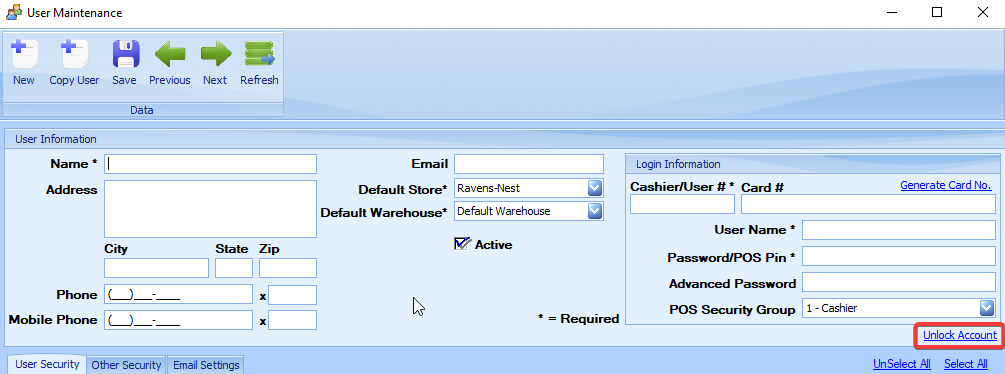
When a StoreLIVE! user enters an incorrect password more than six (6) times in succession, the system will lock the user’s account. When an account is locked, the user is unable to login, even if the correct password is entered.
To unlock a user account, another user with “Edit Users” privileges must login, load the locked user’s account, and click the “Unlock Account” link.
NOTE: For a video tutorial click here. How To Create A User