
All inventory in StoreLIVE! must be assigned to a warehouse and a location within the warehouse. A warehouse typically refers to an actual building or store, but sometimes it may be advantageous to create more than one warehouse, even for a single physical location. A location within the warehouse is typically a storage bin, shelf or room.
Minimum and maximum re-order points are assigned to items based on a warehouse, so multiple warehouses allow ordering to be segmented. However, if location tracking is desired, but the goal is to have reorder points based on the overall inventory quantity, then utilizing a single warehouse, with multiple locations defined within the warehouse, is the preferred setup. Also note that when using accounting integration, inventory can be assigned to department/division asset accounts or classes based on the warehouse. If from an accounting standpoint, it is necessary to track inventory in separate asset accounts based on location, then multiple warehouses should be utilized.
A warehouse must also be assigned to a store. When items are sold at the Point of Sale, inventory is removed from the warehouse assigned to the store. In a multi store setup, creating a warehouse for each store is the recommend setup.
Creating and Maintaining Warehouses
-
On the StoreLIVE! Main Menu, click the Settings, Warehouses and Store Setup button.
-
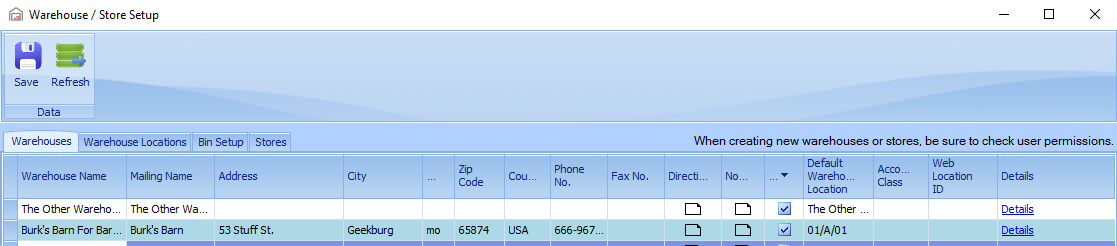
Warehouse information is maintained on the Warehouses tab.
-
The default warehouse location is a required field. When items are received or sold, and specific item locations are not defined, the system will always use this default location.
-
The Mailing Name field will appear on reports and on items such as purchase orders.
-
If accounting integration is being utilized, a division or class can be selected from the Accounting Department dropdown.
Creating and Maintaining Warehouse Locations
-
On the StoreLIVE! Main Menu, click the Settings, Warehouses and Store Setup button.
-
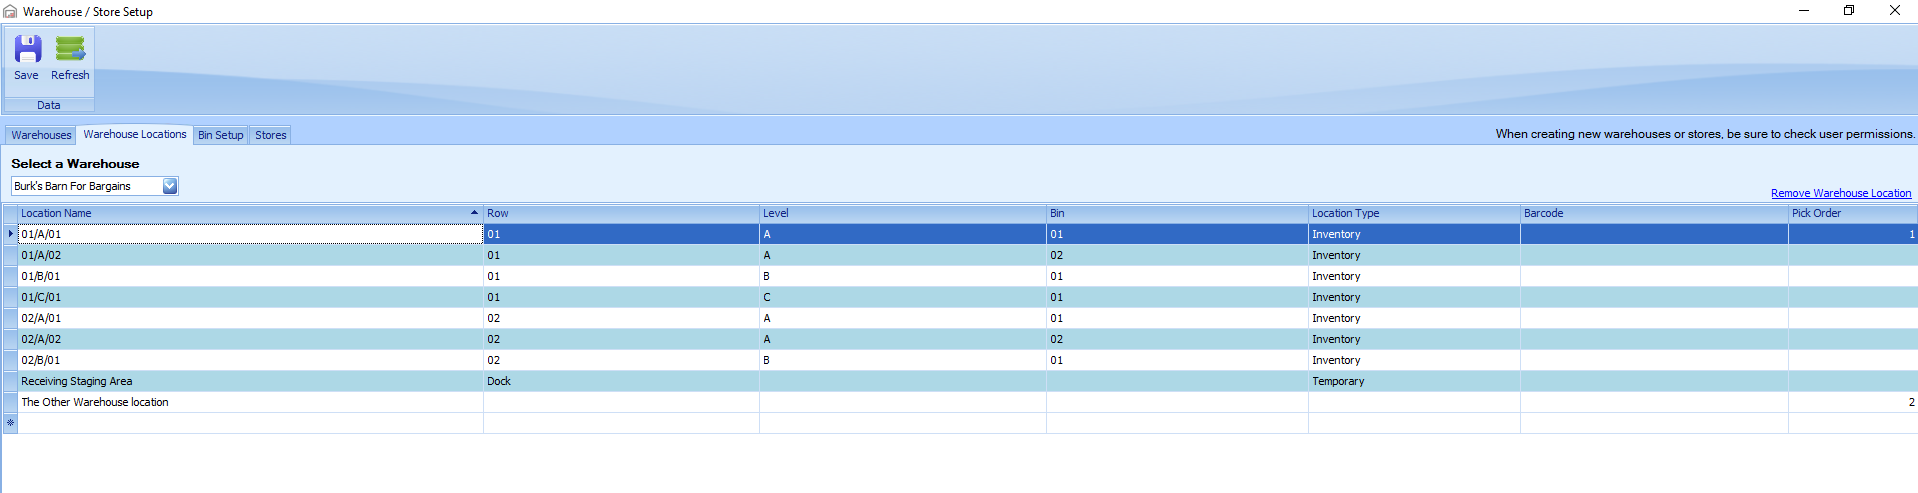
On the Warehouse / Store setup screen, click the Warehouse Locations tab.
-
Select a warehouse from the dropdown
-
Locations can be entered in the Location Name column.
-
Row, Level, Bin can be assigned to the location after being created in Bin Setup. (beta feature)
-
Barcode value can be entered barcodes are printed on the shelfing labels.
-
Location order can be specified by entering a value in the Pick Order column. This value can be referenced on reports to list items in a specific order, such as for pick or transfer sheets where a picking order may be desirable.
Location Types
Inventory - (will hold inventory) Inventory can be stored, received, transferred, and sold from and into these locations.
No-Inventory - (will not hold inventory) Used to tag items with normal location for an item for staff to reference.
Temporary - (Beta-Not yet used)
Defining default locations on a per item basis
When item are sold at the Point of Sale, or items are received using the StoreLIVE! Receiving program, the system will add or remove the item from the default warehouse location defined in the warehouse setup. Sometimes it may be desirable to override this default location on a per item basis. For example, if Widget A is always stored in “Bin A”, it is most efficient to have the system auto set this location when receiving this item. Furthermore, if Widget A is always transferred to location “Shelf 1” to be sold, the system should remove the item from “Shelf 1” when the sale is recorded.
To setup these default locations, follow the instructions in Item Maintenance|Default Item Locations section.
Using document Barcode fields and default locations
Numerous application screens within StoreLIVE! such as receiving, transfers, and inventory count, include a barcode field to allow items to be added to the document by scanning or entering the barcode number.

When utilizing this feature, items will be added to the document based on the item’s default sales or receiving location if one or more of these locations are defined; otherwise the warehouse default location will be used. (Sales Orders/Invoices will use the Sales location; other document types will use the Receiving location)
To override the warehouse or item location, check the “Enable Location” field. This will enable the Location dropdown. A specific location can then be selected from the dropdown, and this is the location that will be used when items are scanned.
Creating and Maintaining Bins
-
On the StoreLIVE! Main Menu, click the Settings, Warehouses and Store Setup button.
-
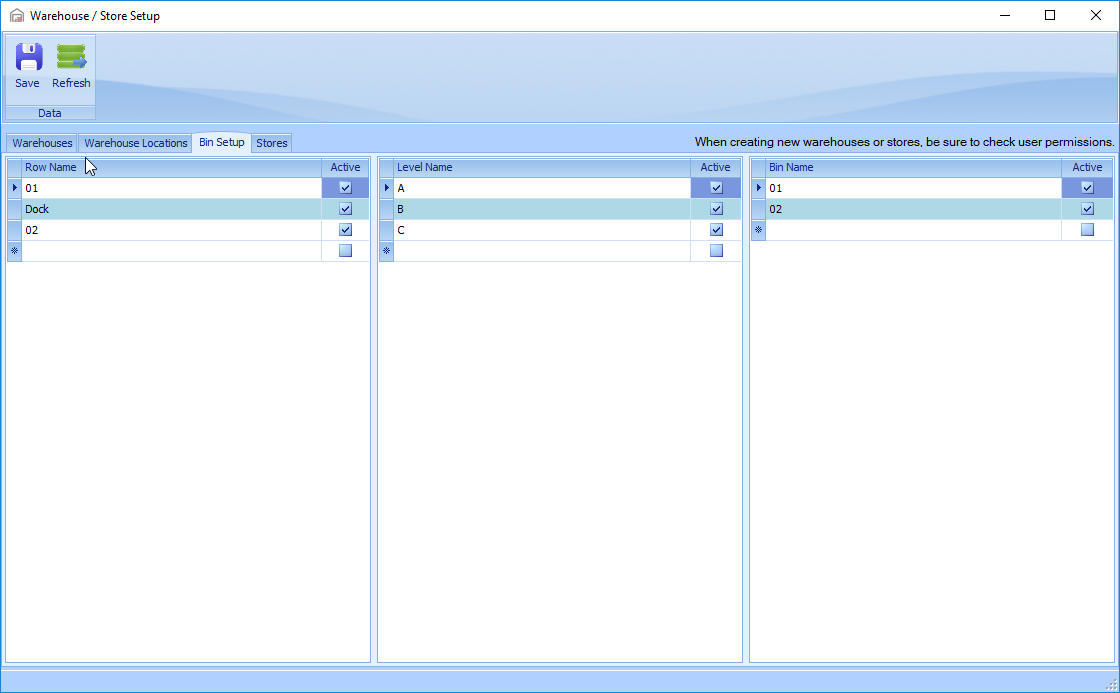
On the Warehouse / Store setup screen, Click the Bin Setup tab.
-
Bins can be assigned to Warehouse Locations.