
Inventory Adjustments
At times it may be necessary to correct inventory quantities in the StoreLIVE! system to match the actual quantity on hand. The Inventory Adjustments application is used to make these corrections. Adjustments should be used to change the inventory quantities when changes are required for reasons other than sales and receiving. Examples of this could include corrections required due to theft, discarding merchandise, and donations of merchandise.
Creating Adjustments
-
Click the “Inventory Menu” button on the StoreLIVE! Main Menu.
-
When the Inventory Menu appears, click the “Inventory Adjustments” button.
-
When the “Inventory Adjustment Document Locator” screen appears, click the “New Inventory Adjustment” button.
-
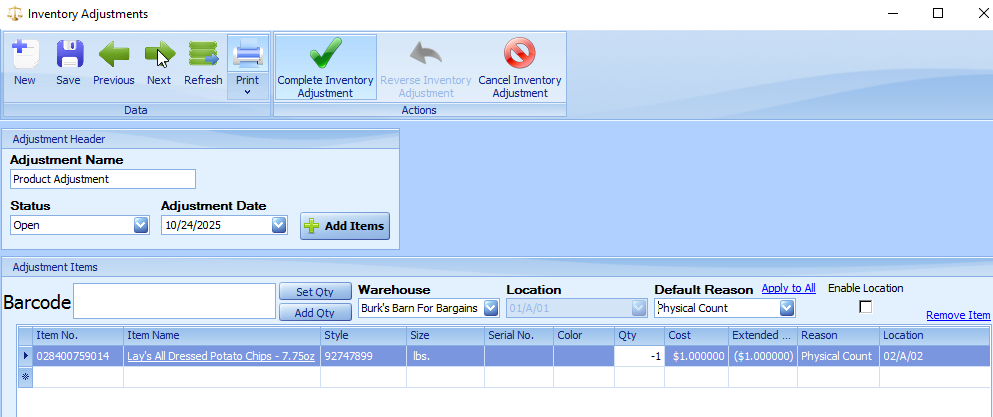
In the Adjustment Name field, enter a description of the adjustments, such as “Discarding Old Merchandise”
-
The Adjustment date will default to the current date. If the adjustment date should fall into another time period for accounting purposes, it may be changed.
-
Items may be entered onto the adjustment document by entering/scanning the numbers in the Barcode field, or by entering or looking up items utilizing the Item No. field.
-
The Qty field should contain the quantity to adjust. Entering a positive number will increase the inventory on hand, and entering a negative number will decrease the inventory on hand.
-
If Inventory is being increased, a cost must be entered. By default, the system will set the Cost value to the Last Cost of the item if one exists. If a Last Cost is not available, the system will use a vendor cost.
-
If Inventory is being decreased, the cost field can be ignored. The system will auto set this field based on the cost of the items it removes from inventory when the adjustment is completed.
10. An Adjustment Reason should be selected from the Reason dropdown. For accounting purposes, adjustments reasons can be mapped to different types of expenses. Adjustment Reasons are setup in the Inventory Setup Settings section of the system Settings.
11. The Location field should be set to the warehouse location where the item is being adjusted.
12. When finished adding items to the Adjustment Document, click the “Complete Inventory Adjustment” toolbar button. This will process the adjustments and update the Inventory totals.
13.Reverse Inventory Adjustment will create a new inventory adjustment with the quantities the opposite of the adjustment being reversed.
System Generated Inventory Adjustments
The StoreLIVE! system does not allow inventory on hand quantities to be negative. When a transaction occurs that would cause the inventory quantity total to be negative, the system will generate a System Inventory Adjustment with the current date. This adjustment will assure that the quantity never is negative.
From a technical standpoint, every time an inventory transaction takes place that reduces inventory, the system will first verify that enough inventories exist to satisfy the transaction. If the required quantity does not exist, the system will first increase the inventory quantity, allowing the transaction to complete successfully. The value assigned to the inventory adjustment is the Last Cost of the inventory item.
Example: If 1 shovel is listed on inventory and 2 are sold at the Point of Sale, when the sales transaction is processed the system will create an inventory adjustment with a quantity of 1, bringing the total inventory on hand to 2. The system then completes the sales transaction reducing the inventory quantity by 2, resulting in a 0 inventory quantity on hand.