
Sub Menus and Quick Menu Setup

Sub Menus or a Quick Menu can be set up using the StoreLIVE! Manager POS Sub Menus application.
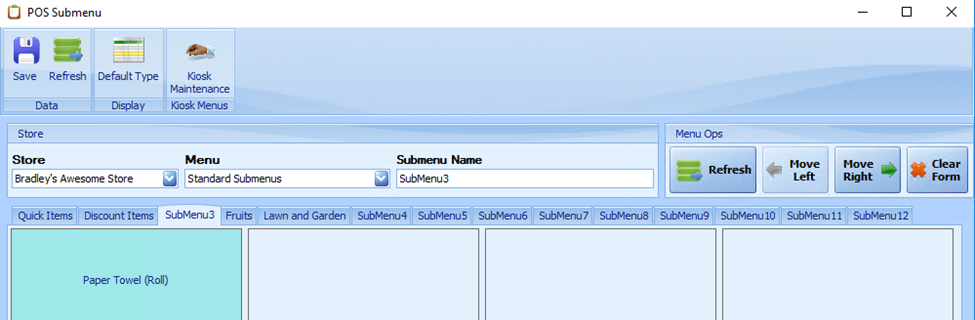
To set up an item on the menu, click the POS Sub Menus button on the StoreLIVE! Manager Main Menu. Click on the appropriate tab. (Quick Items, SubMenu3, etc.) Click on a button (empty rectangle) to edit. In the “Choose Item” field, enter an Item Number or click the “…” button to search for an item. Once the item is selected, the description of the item will be displayed in the “Enter Description” box. This description can be changed if wanted. The color of the button can be changed as well.
Names can also be assigned to Sub Menus under Submenu Name, and this name will then be displayed on the Point of Sale Sub Menus screen.

Note: Touchscreen submenus have a setting for 16 items or 64 items. See the Advanced Submenu Settings section for info on how to switch from large buttons to small buttons.
Submenus can be further customized. Use the “Move Left” or “Move Right” options to change the position the menu will occupy in the POS system.
Buttons can be moved around by dragging a button to the new button location. If the button location is already used, the buttons will swap locations.
Note: You must save your changes before you refresh the screen.
Setting Up Extended Sub Menus
A new feature using “Modifiers” has been added and is a useful way of not having to link submenus to each other.
You can also set up extended submenus. When you press a button set for an extended menu, it will bring up a more specific options instead of an item.
Here are the steps taken to create an extended menu named “Pies.”
Rather than choosing an item simply type in the name of the button “Pies” .This button will not be linking to an item but to an extended submenu. In the choose next submenu drop down choose the extended submenu in which you will have the additional Pie submenus.
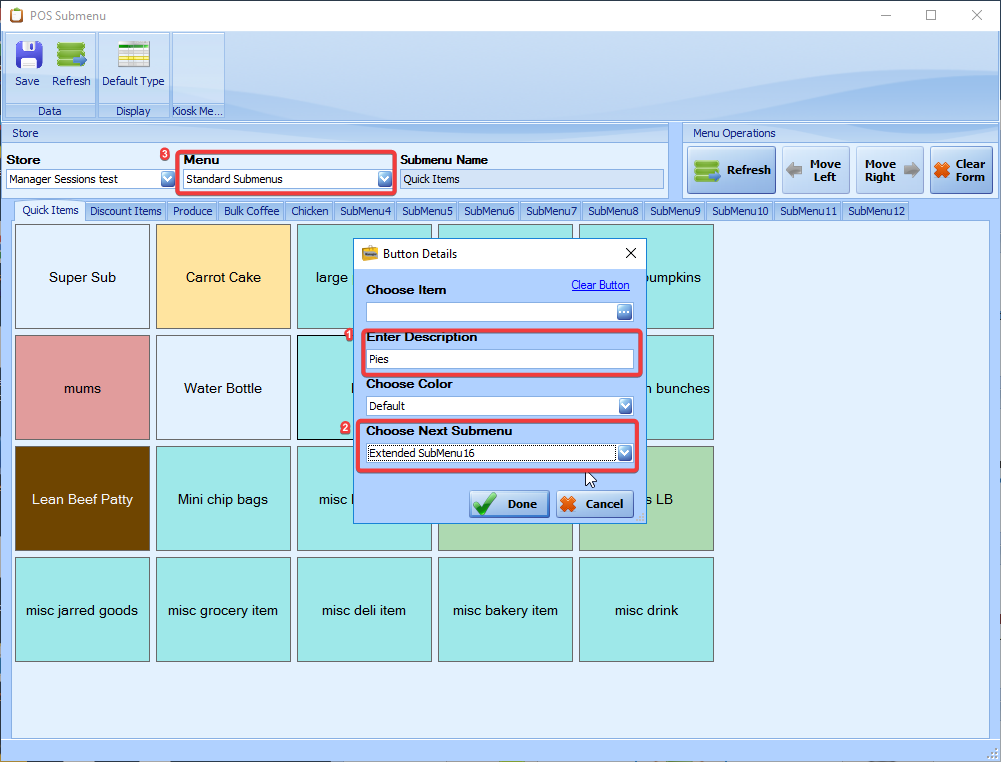
Select the extended submenu from the Menu Drop down to add buttons to the extended menu and name the extended submenu.
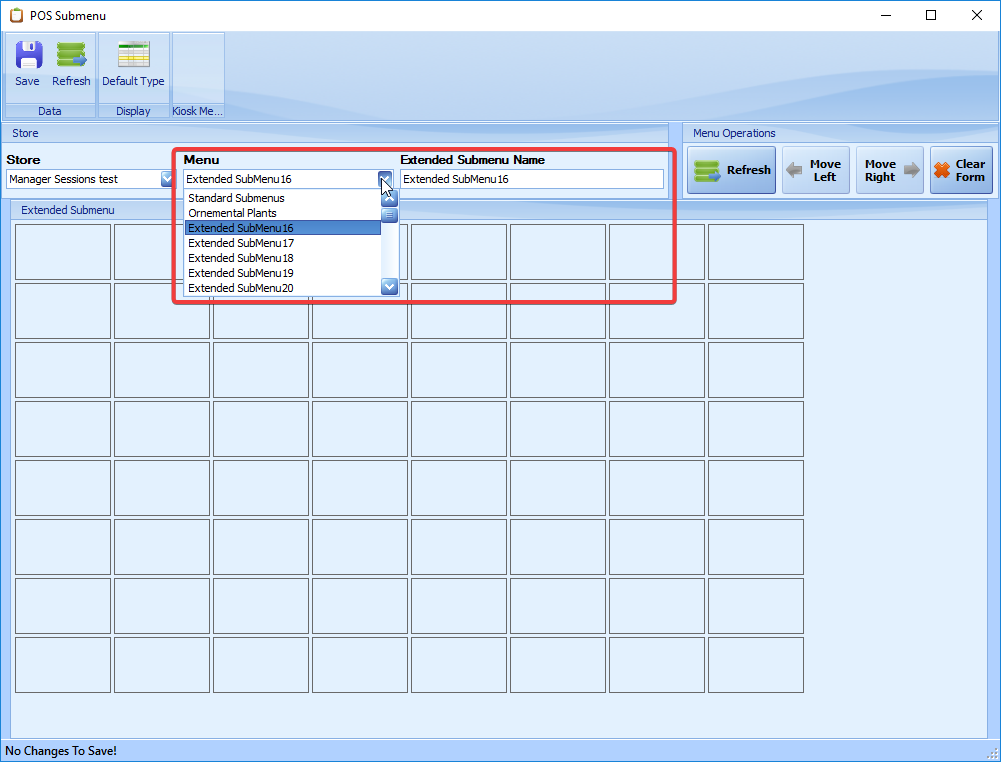
Extended menus can be stacked in each other if needed.
Next Submenus cannot be used from the Quick Items screen.
Advanced Submenu Settings
There are several advanced sub-menu settings you can access under the “POS Settings” list.
DefaultSubMenu: this setting controls which submenu is displayed by default when the POS Sub Menu Button is pressed. Valid values are 1-12.
SubMenuButtonName: this controls what name is displayed on the Sub Menu button.
QuickItemsButtonName: this controls what name is displayed on the Quick Items button.
SubMenu buttons can be set to be either large (16 buttons per menu) or small (64 buttons per menu).
The following Advanced settings need to be set for the correct size:
Under POS Settings Submenu Button Size: Large or Small
Under Application Settings: Submenu Button Size: Large or Small
Documentation for the “New Quick Items” Screen will be done in another chapter.