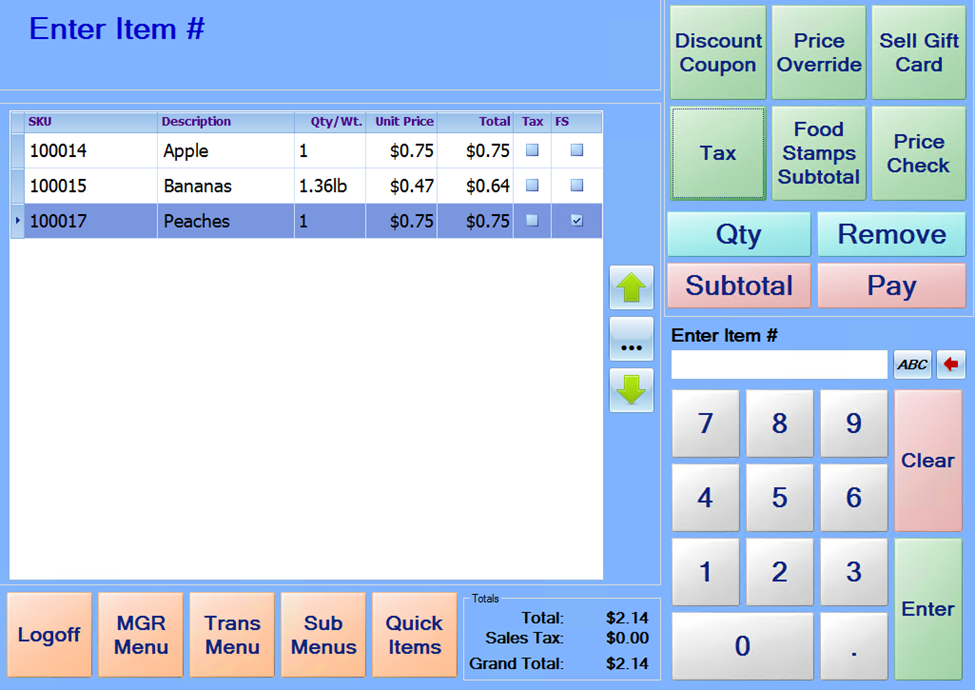
After successfully logging into the system, you will be presented with the sales screen. The prompt at the top of the screen will read “Enter Item #.” At this point, you are ready to start adding items to a sale by scanning the items, keying in item numbers, or selecting items from the Quick Items or Sub Menus.
If an item number must be keyed, and it is an alpha-numeric item number, press the “ABC” button to the right of the item entry field to display an on-screen alpha-numeric keyboard. The button with the red left-pointing arrow next to the item number entry field is a backspace key and can be used to correct item number entry errors.
As you scan or enter items, the items will be listed on the screen along with the quantity, price, taxable status, and food stamp eligibility.
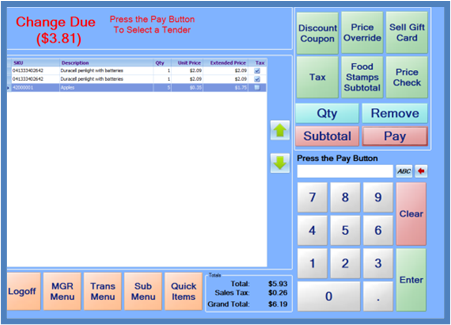
When finished adding items to the sale, touch the Pay button. The Pay screen will then be displayed, showing the total amount due.

Cash payments may be entered by one of 2 methods. If the Amount Due is $100.00 or less, and the customer hands you a single bill, you can simply press the corresponding “Bill” button on the screen.
If the payment amount consists of multiple bills and/or coins, key in the total amount (using the on-screen keypad), and then touch the “Cash” button.
“Exact” can be pressed if the customer pays with exact change, and “Next” can be pressed if the customer pays to next dollar rounded up. (Example: The customer owes $5.45, and they pay with $6.00)
After entering the payment amount, the cash drawer should open, and the screen will display the change due to the customer until the cash drawer is closed.